Creating a stylized grass shader using Unity Shader Graph. (Part-2)
In the previous part, we made a customizable stylized grass shader. In this part, we'll be adding animation to create the wind effect.
Introduction
The way we are trying to achieve wind effect will be split into two methods. The first method will be based on controlling the movement of the grass itself in the fragment shader. The other will be based on animating the vertices of the mesh in the vertex shader. Both aren't necessary to be used together, but one can work without the other one, on the other hand having both makes them look more lively.
Fragment Shader method
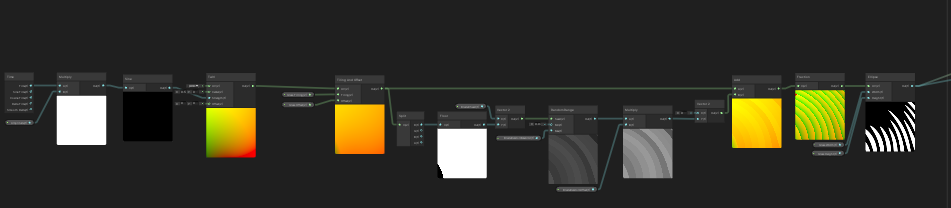
Let's look at our shader graph first.

Observing it, we can see that Tilling and Offset node has one more Input called UV. so maybe we can manipulate this?
There are various UV nodes which we can try out, UV nodes are the nodes which can be used to manipulate UVs. Out of the collection, the one we are interested in is the Twirl node, this node bends the UV in the XY plane.
Let's add the Twirl node by hitting the Space key in the shader graph or Right click > Create node, now search for the Twirl node, and add it to the shader graph.
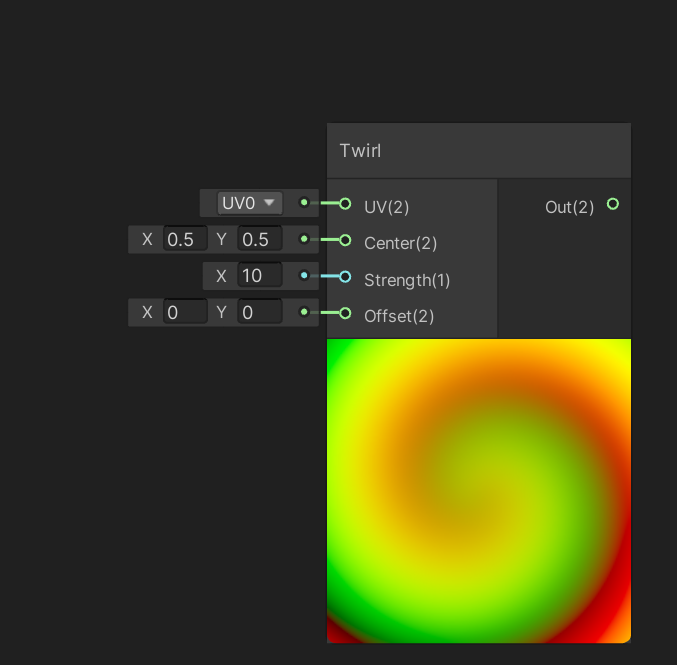
We can see how different the preview is compared to the TIlling and Offset node's preview, it spirals into the centre. Play with the Strength input and see how it behaves.
As we see when we change the strength, the bend moves, if the strength goes negative it bends oppositely. we can use this to create the wind effect.
Add a Time node take the Time output (the other outputs are not required for this) and multiply it with a new Float property called "Amplitude", now we can pass the product of them to a new math node called Sine, Sine node takes the time value as input and gives a sin value of it. This allows the grass to bend both ways in a loop as we wanted.
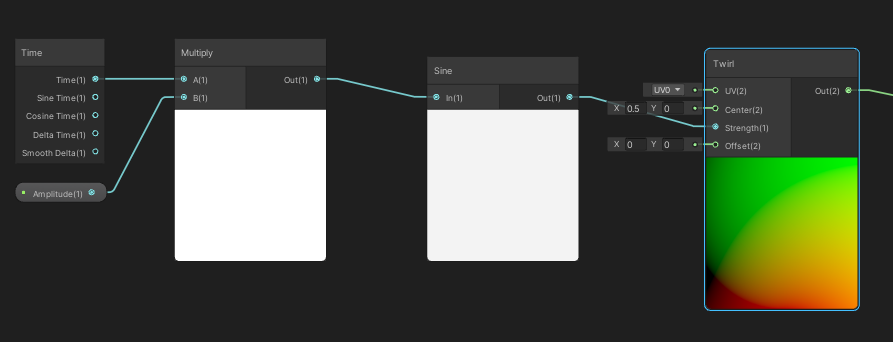
Add the output of the Sine node to the Strength input of the Twirl node, you can now see the UV animating, Connect its output to the Tiling and Offset node, the one which we made previously.
As we can see it's now animating the grass, but isn't it bending a bit more than we want it to?
To fix this and control its bending, Let's create a property called "BendStength" and take the Sine input and multiply both, then take the output and connect it back to the graph.
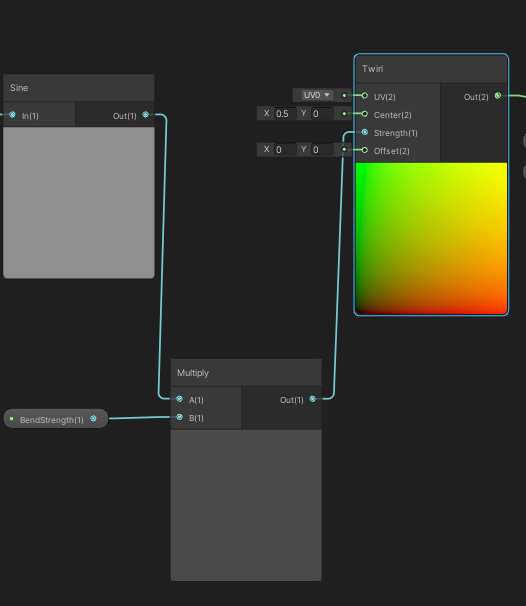
With this, we can control the bend factor of the grass.
That's pretty much my method to animate the grass. Now let's add some details to make it more interesting.
Before we add details let's organise our shader graph.
Let's select everything from the Twirl node to the Elipse node.
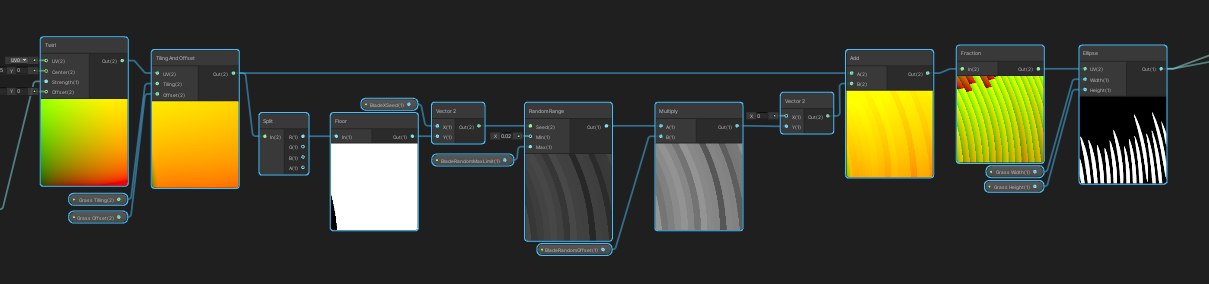
Right-click and go down the context menu to Convert to > Sub-graph, Save it under a new folder called "Sub-graphs" in your shader folder, and name the sub-graph "grassBase". This is useful for two things; one it makes the shader graph look much cleaner and two we can reuse the grass base we created without needing to duplicate it again in the shader graph.
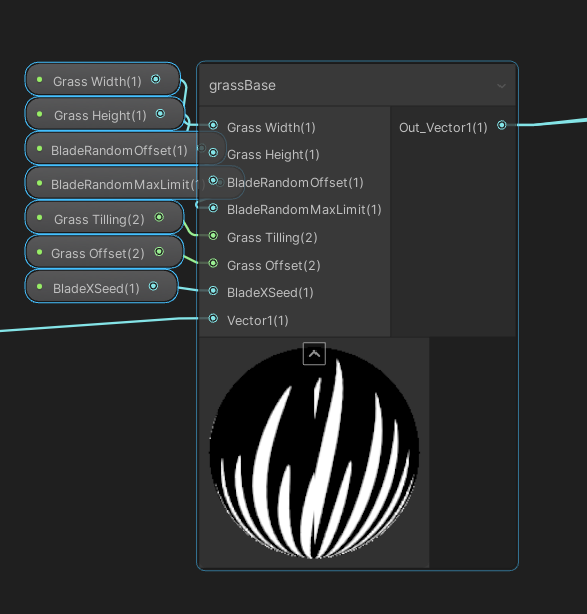
You can double-click on the sub-graph to edit it, you might notice that I have one properly named "Vector1(1)", it was cause I selected the connection, and Unity created a property in the sub-graph to make it work properly, Opening it up I can now edit that property to rename it to "Strength".
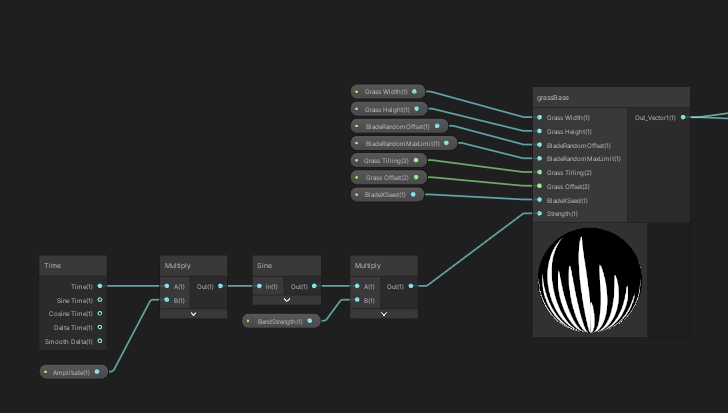
Here's the final shader graph.
Now onto the details.
Let's add another "grassBase" sub-graph to our graph. You can add a sub-graph just like a normal node by pressing Space and entering its name.
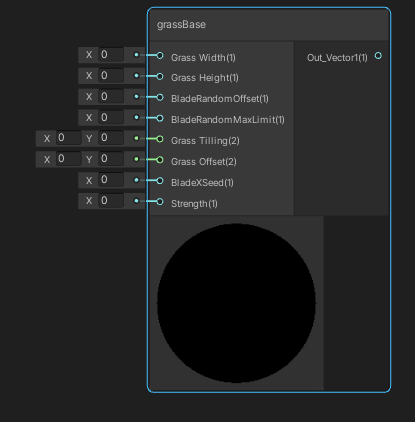
We can see that we have to add inputs to this sub-graph too, Now one could create a second set of properties to control this sub-graph to create more variation, but I am going to assign the same properties for the sake of simplicity.
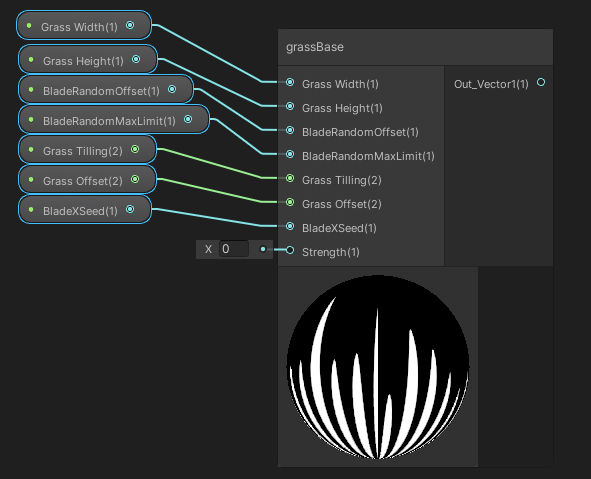
Except for the Strength input, I've added the exact properties as the first sub-graph, The reason we created a second "grassBase" sub-graph is now we can offset the animation to create a second layer of grass.
We can offset the animation by taking the output of the product of the Time and Amplitude nodes and just like we added it to the Sine node, but this time we can add it to a Cosine node, then multiply the Cosine with the "BendStrength".
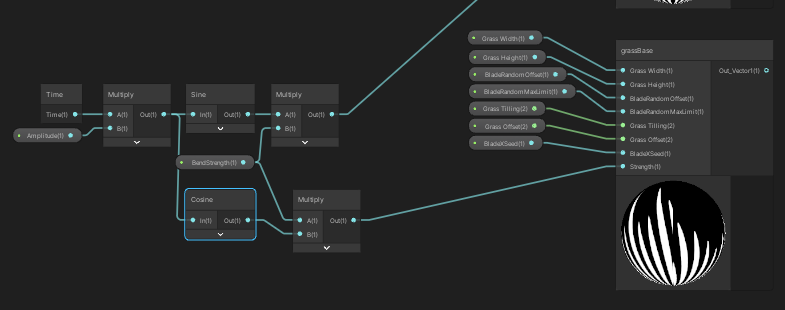
If you observe the difference between the Sine node output and the Cosine node output you can see they are animating in the opposite way to each other.
Add both outputs of the "grassBase" sub-graph.
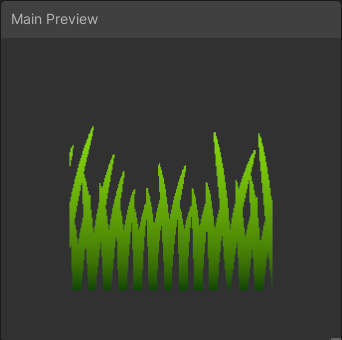
You can see we have somewhat of a more lively grass. We can stop here and use this shader as is, but if we want to take a step further we can animate the vertices.
Vertex Shader method
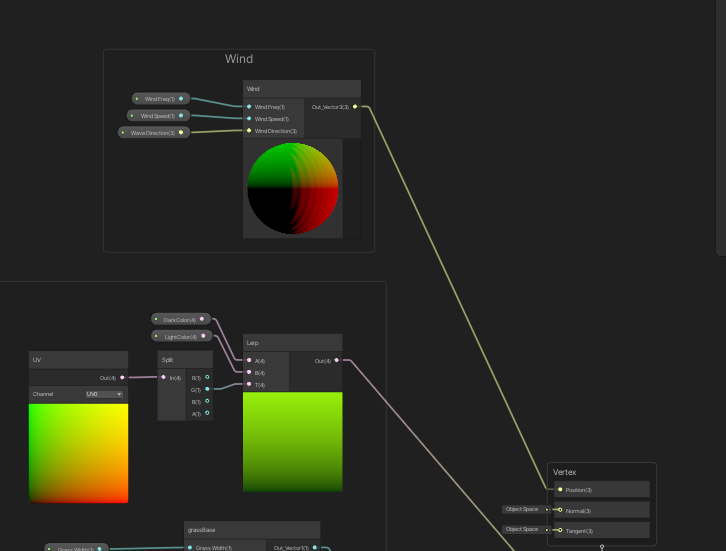
The way we can animate by manipulating the vertices is by creating a Wind sub-graph.
I'll be brief about this since this method is a slight extension of Cyanilux's Vertex displacement method.
Create a new sub-graph in your sub-graph folder, call it "Wind".
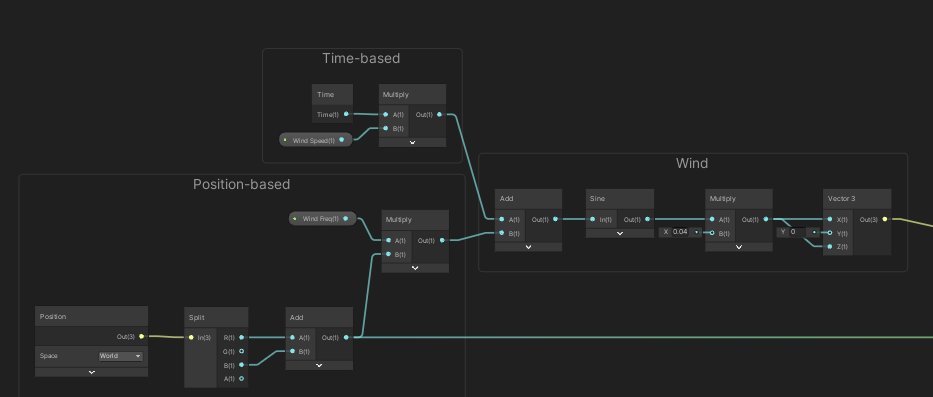
All I added to Cyanilux's method is add a property (WindSpeed) to the Time-based frequency to control the time and add a property (WindFreq) to the Position-based frequency, and slightly modified the Position based group; I only took R/X and B/Z values of the spilt and added them as the output before multiplying it.
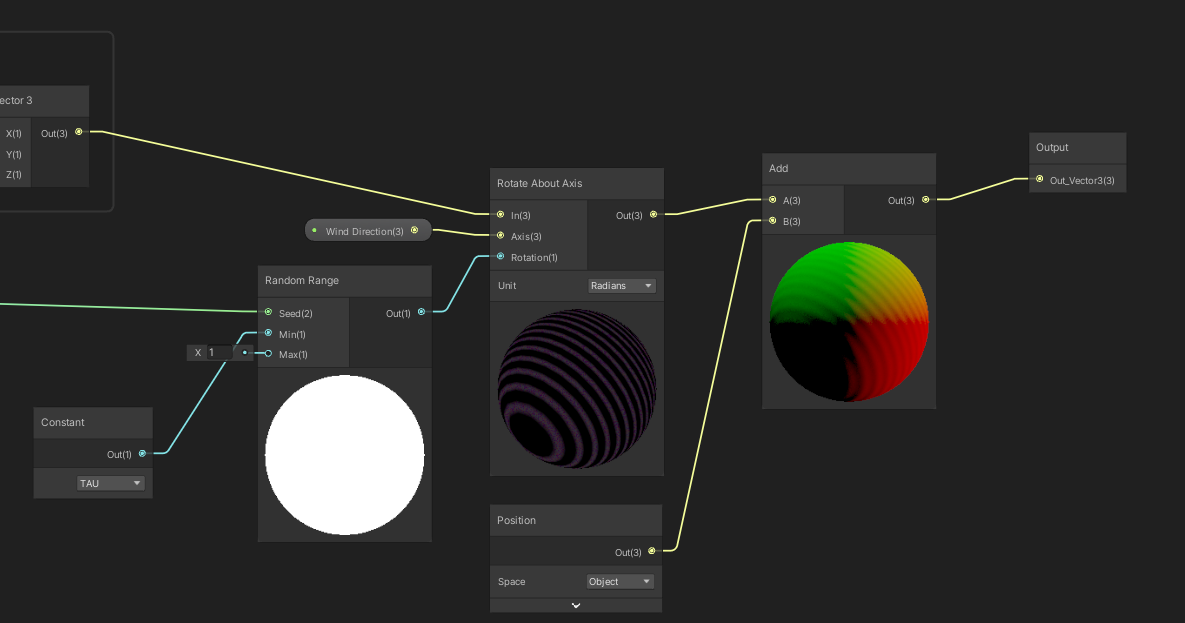
After that, I took the sum of the Position based frequency and added it as a seed input to the Random Range node, with its Min set to a Constant (TAU) and Max to 1.
Then add the output of the Random range to the Rotation value of Rotate About Axis node. in Rotate About Axis I've also added the Wind output to its "In" input, With a new Vector3 property called "WindDirection" we can control the wind direction by connecting to the Axis input, Also don't forget to set the Unit of the node to Radians.
At last, we add the Rotate About axis output with A Position node (Space set to Object). We can add this to the Output of the sub-graph.
Add this sub-graph to our Stylized Grass shader graph, create three properties corresponding to the sub-graph inputs and add its output to the Position input of the vertex shader.
There we have it, An animated stylized grass shader. Play with the Wind properties to achieve your desired effect.
In the next part let's discuss more on optimizing the shader and creating LOD-based animations.
If you like it and/or have any feedback or questions feel free to ask, Thanks for reading!
Notes
I used Unity Version 2020.3.33f1 and Shader Graph Version 10.8.1.
I used URP version 10.8.1 for our game, but it is possible to recreate the shader in HDRP.
References: