Creating a Simple Projector in Unity.
Hey there! Let me tell you about a simple way to create a video projector in Unity, The idea is to let us play any video of our liking inside Unity as if it's being projected onto a screen.
NOTE: This method is intended to work with HDRP and might also work in URP although it has not been tested. This method will not work on the WebGL Platform because of certain limitations.
💡Idea
When our team was ideating on our game, we came up with a puzzle idea that features a projector, but the "quest" to find a decent, free resource to create a projector in Unity was out of reach and we had to improvise to create a projector. That's when I came up with a pretty decent solution if I say so myself.
If you played the game CONTROL, you might have seen projectors all around in the game and that was the idea, so let's try to recreate a projector like that.

🔧 Setting up the scene
Create a scene in Unity and create a simple room to test out the projector.
We need to set up lighting, but we'll do it later.
📽️ Importing the Model
Let's get a projector 3D model. I am using this projector model as an example. Once you get your model either through a source on the internet or make one yourself, import it to your project.
Create an empty GameObject in the scene and call it "VideoProjector"
Drag and drop the projector model from the asset folder on "VideoProjector" which makes the model a child of it.

Great, we have successfully imported a projector model.
🖼️ Creating a render texture
In our asset folder create a render texture, by Right-clicking > Create > Render Texture.

Name it "ClipRenderTexture".

Keep the Size very low to have a better performance, anywhere from 500x500 to 200x200 is fine, also Keep the ratio of the size 1:1 otherwise the trick won't work. Leave everything else on default.
📹 Setting up the Video component
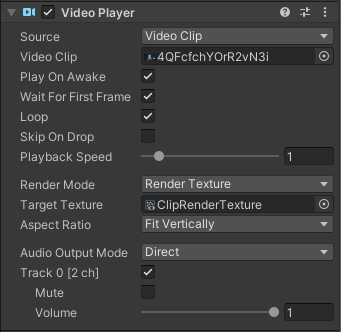
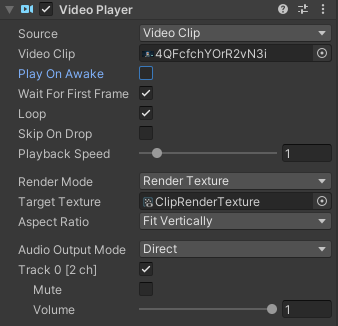
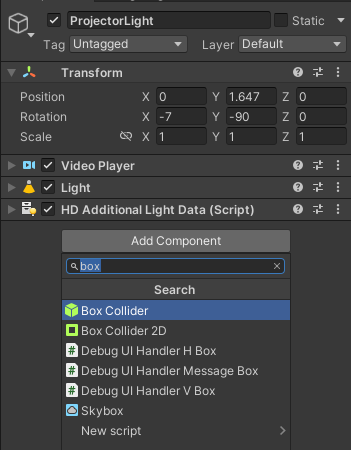
Right-click on "VideoProjector" and select Create Empty, which will create a GameObject, let's name it "ProjectorLight", after creating it let's add the component 'Video Player' to it.
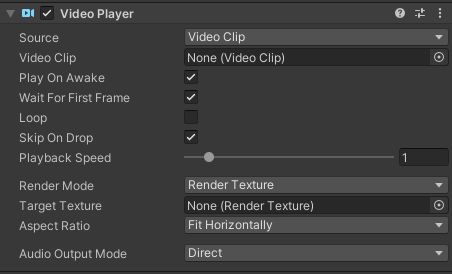
We can see there are a lot of properties we can work with, you can refer to the official documentation to see what every property does, but let's focus on the properties we need to modify.
Source: By clicking on the drop box we can see there are two options; 'Video Clip' and 'URL'.
Video Clip: This means any video media from our asset folder, formats like .mp4, .mov, and .wmv, I'll be using this to demonstrate.
URL: This means not the web URLs unfortunately😞, it's a file path reference so you can play a file by giving its location directory.
Video Clip: Here we reference our media asset.
- If we select the URL in the Source property, we get to set the file path here.
Loop: This option lets us replay the video from the start once it's done playing, I checked it so the video can keep playing.
Render Mode: This is the main "sauce" we are looking for, there are various methods we can use to render the video, but what we are specifically looking for is the option 'Render Texture'.
- Target Texture: After selecting 'Render Texture' drag and drop the Render Texture "ClipRenderTexture" we made earlier as its reference.
Aspect Ratio: Set it to 'Fit Vertically'.
📽️ Setting Up the "Projector"
Now that we set up the render texture and video component, how do we project it into our game world?
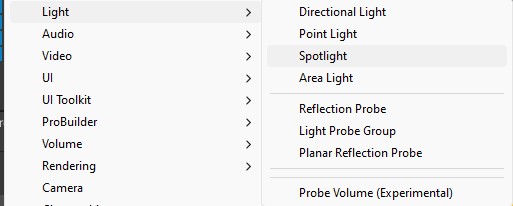
Simply, we are going to create a Light 😁, Specifically a spotlight.
Add another component called 'Light' to our "ProjectorLight".
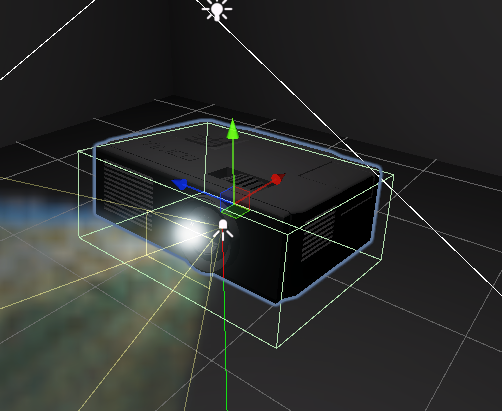
Let's reset the "ProjectorLight" transform and adjust the position so it's just in front of our projector model's lens.
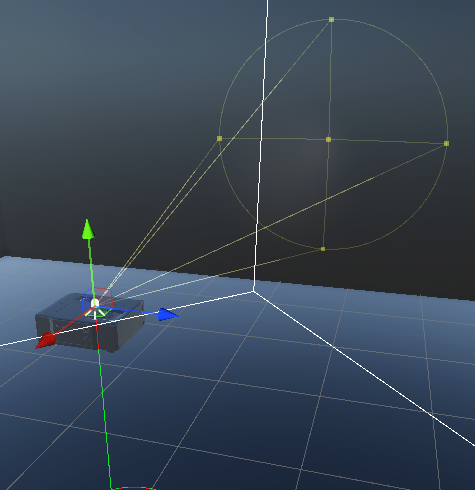
Usually, projectors have a slight elevation so let's set our "VideoProjector" transform to have a slight angle.

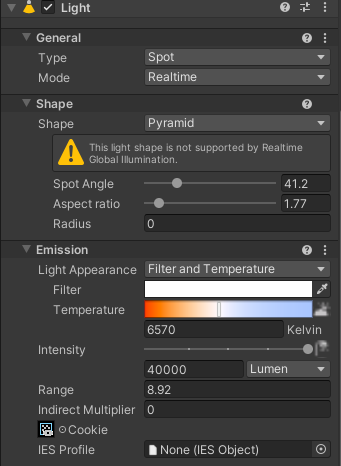
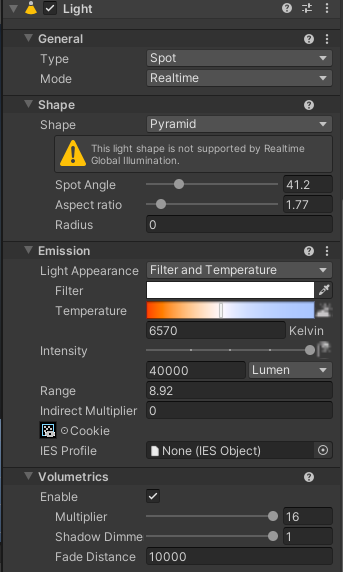
Set the following Light Component properties as such:
Mode: Realtime.
Shape: Pyramid, Once you select it you'll get a warning saying "This shape is not supported by Realtime Global Illumination", What it means is that the objects around the room won't have in-direct lighting based on our projector light, this is the slight drawback of using this method.
Spot Angle: Adjust the angle to see what size fits your level.
Aspect Ratio: Set it to the ratio of your video, if the video's aspect ratio is 16:9 the value would be 1.777. (16/9 = 1.777).
Radius: Adjust to preference, it's useful to control how even the light is spread.
Intensity: Tweak it to get the preferred brightness.
Range: If you can't see your light falloff you can tweak this slider so that it hits the wall or exceeds the wall slightly.
Indirect Multiplier: As said before, since this method does not support GI it's unnecessary to have a multiplier value, so set this to 0.
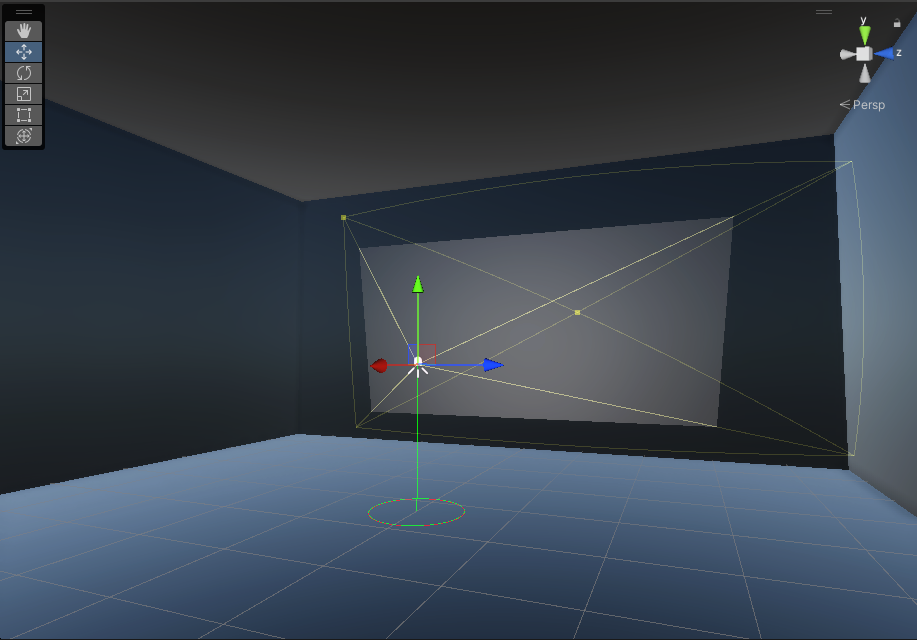
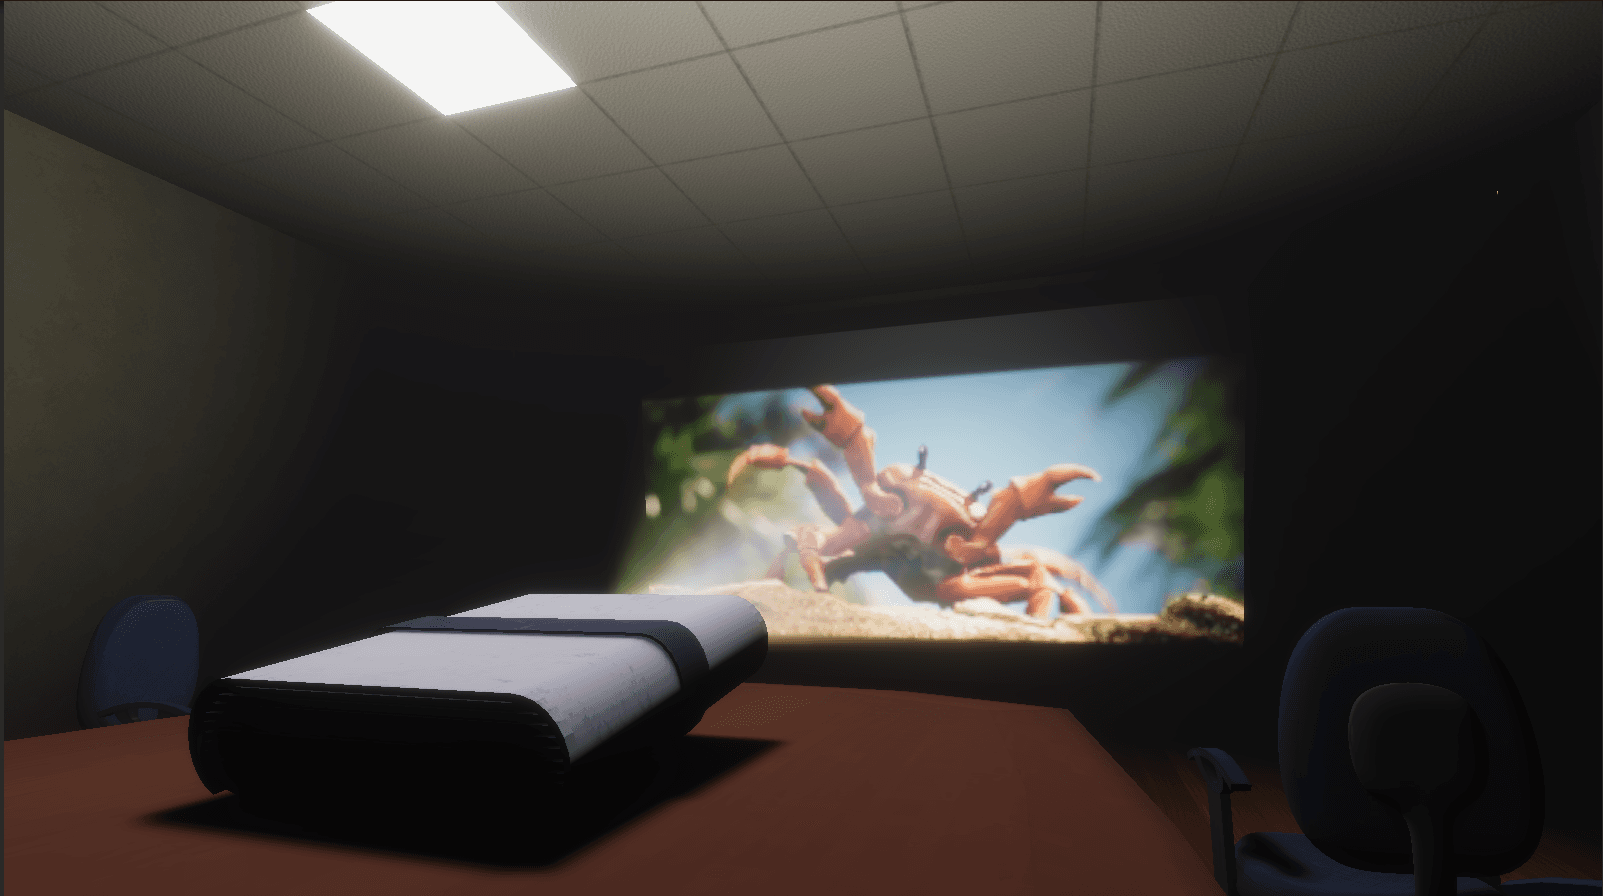
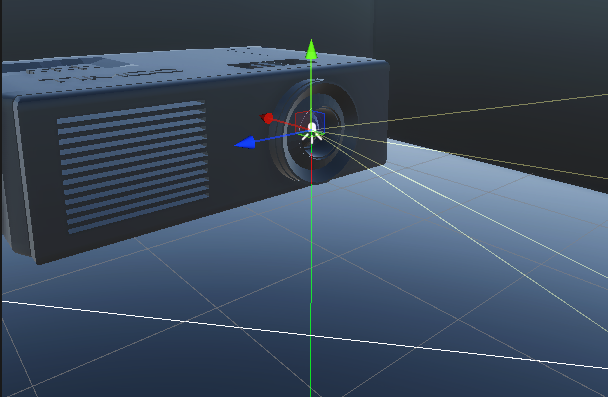
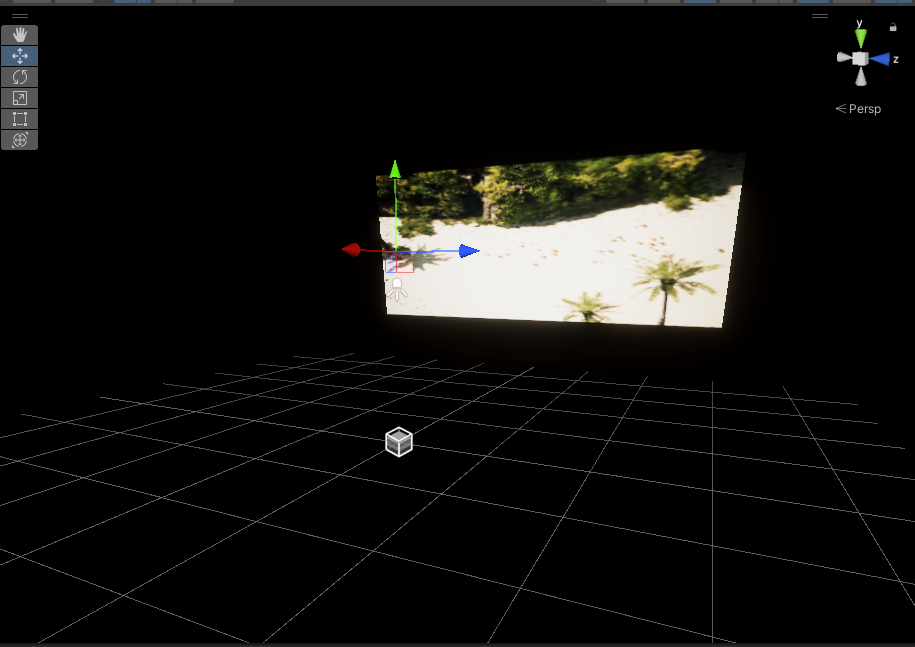
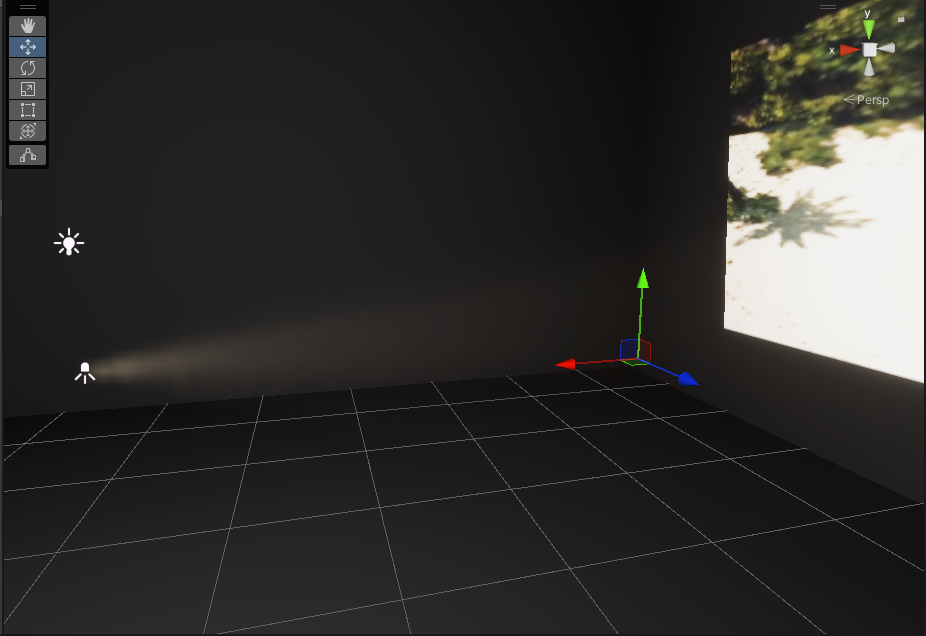
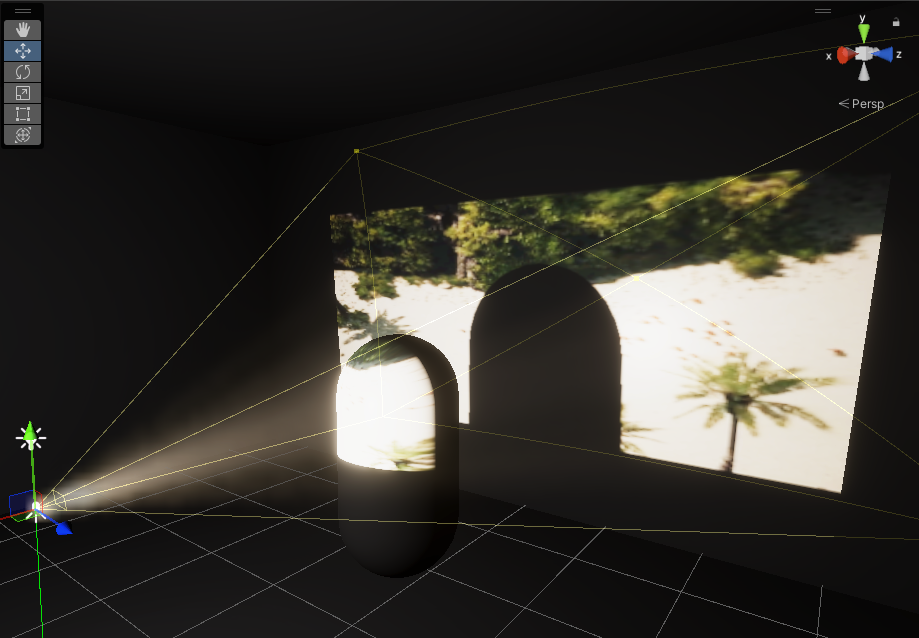
You should end up with something like this.
(P.S. I've set the intensity value to the max just to show here, but this is not the recommended intensity, see what fits your level).
It should now look something similar to this.
Now the MAGIC setting... 🥁Drum roll🥁.
- Cookie: Set this to our RenderTexture "ClipRenderTexture".
Set this and... nothing, our spotlight just disappeared hmm...
All we have to do now is go into Play mode!
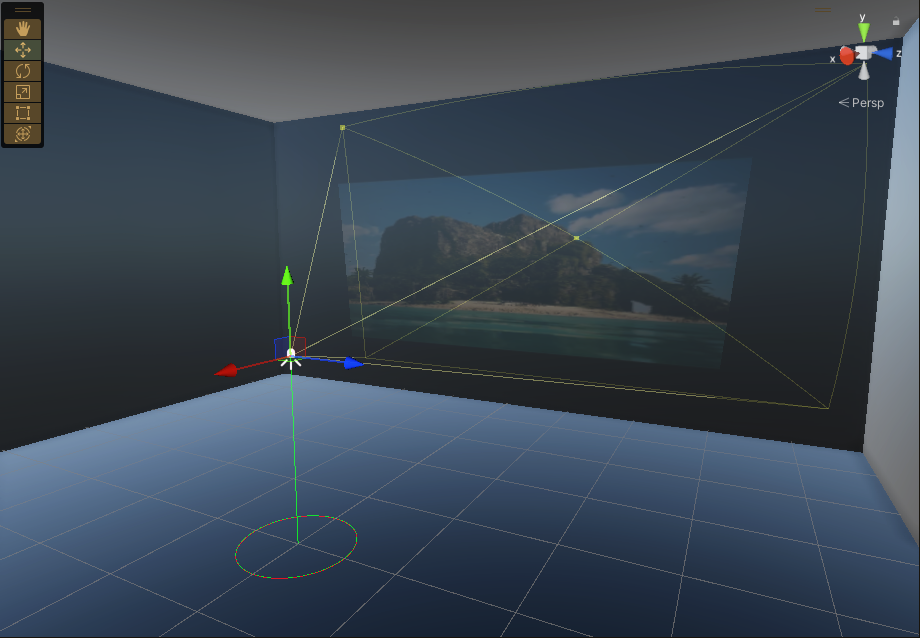
And there we go we can see the video playing on the wall like a projector, I've tweaked properties to fit my level, and you can too according to your level (Beware any changes you make while in play mode will be gone once exiting the play mode).
🔦 Lighting
The projector looks dim doesn't it, well it's just working as a real projector would work in a sunny place. Let's fix that.
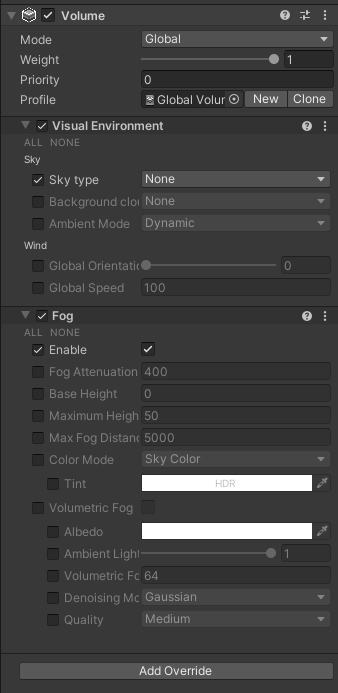
Right-click in the Hierarchy tab and add a Volume > Global Volume.
Create a new Profile over in the Inspector.
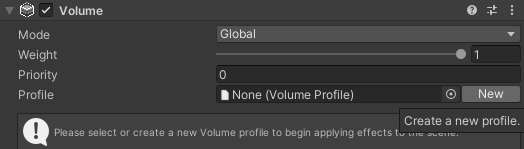
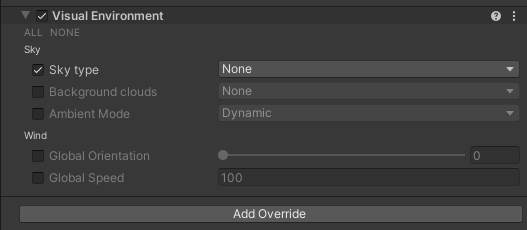
Add an Override called "Visual Environment".
Enable the "Sky type" and set it to None, if it isn't set by default.
That's much better right? but we can't see the room so let's add a point light to lit up the room.
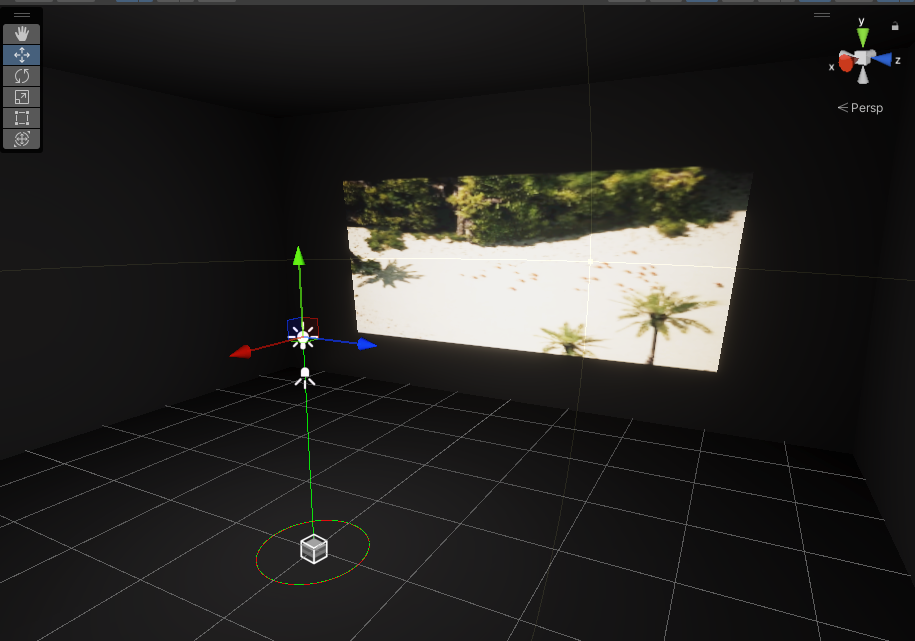
Nice.
In HDRP there is an additional feature called Volumetrics, to use this make sure it's enabled in the 'Light' component of our "ProjectorLight".
And then add a "Fog" override to our Global Volume and enable it as well.
You can see a faint beam coming out from the "ProjectorLight", adjust the Multiplier in the Volumetrics to get more intensity of the beam.
✨Let's make it more interesting.
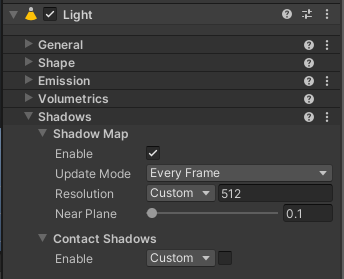
Enable the Shadow Map in the 'Light' component of our "ProjectorLight".
Now you can have dynamic shadows if any object moves in front of your projector.
That's pretty much it for a basic projector, you can add more details on it to make it more awesome, I also have some bonus ideas to make it much more interesting.
🎁Bonus #1!
Driving the Projector from a script.
First, let's disable the Play On Awake on the 'VideoPlayer' component.
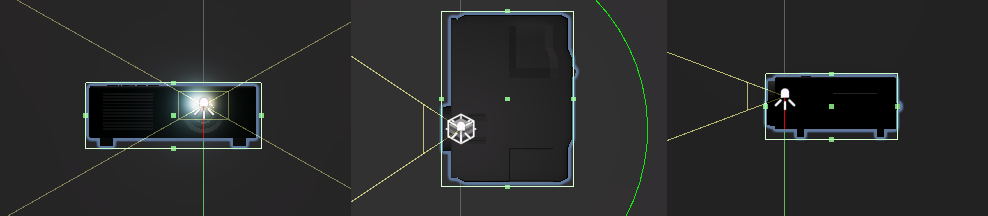
Select our "ProjectorLight" and add a box collider.
Adjust the size to fit the projector.
- I suggest using the orthographic view to adjust the box collider size. (We previously have set the X rotation to be something around -7 and we need to make it 0 for this method to work, once we are happy with the collider bounds we can set it back to -7).
Ok once we are set with the bounds, we can write a simple script to control it.
Create a new Script in the Project folder and call it "ProjectorInteraction".
- Drag and drop this Script onto our "ProjectorLight" GameObject.
Double-click the script to open it in Visual Studio.
In the class add three private variables:
  using UnityEngine;
  using UnityEngine.Video;

  public class ProjectorInteraction : MonoBehaviour
  {
      private VideoPlayer videoPlayer;
      private Light projectorLight;
      private bool isProjectorOn;
  }
Define the Awake() function and assign our variables to the components in unity, this is done by using the GetComponent<>() function.
  private void Awake()
      {
          videoPlayer = GetComponent<VideoPlayer>();
          projectorLight = GetComponent<Light>();
      }
Let's also add our initial settings for when the game starts in the Start() function, some settings are useful in preventing some wrong behaviour.
              private void Start()
                  {
                      if (projectorLight != null)
                      {
                          projectorLight.enabled = false;
                      }
                      if (videoPlayer != null)
                      {
                          videoPlayer.enabled = false;
                      }
                      isProjectorOn = false;
                  }
Let's add a function called OnMouseDown() this is an event function in the MonoBehaviour class which executes the code in it when the user is on the collider and presses the mouse button
- You can implement your own logic to interact; by pressing E, etc. But for this demo, I'll be using the simple OnMouseDown() function.
    private void OnMouseDown()
        {
        }
In the function let's write some code as such.
   private void OnMouseDown()
      {

          if(isProjectorOn)
          {
              projectorLight.enabled = false;
              player.enabled = false;
              player.Pause();
          }
          else
          {
              projectorLight.enabled = true;
              player.enabled = true;
              player.Play();
          }

          isProjectorOn = !isProjectorOn;
      }
What this does is whenever the mouse button is pressed it will see the previous state of the projector (say it's in the ON state now) and execute the opposite state (which means it will change it into the OFF state).
🎁Bonus #2!
A Cloth screen.
To have a cloth screen, we need a plane mesh with a fairly decent polycount for the simulation to work, but the default Unity plane is too low poly (It is only 4 quads).
We can make that mesh in 3D modelling software and import it, but let's see how we can make it in Unity itself.
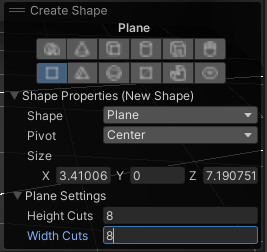
For this, we need the ProBuilder Package and the FBX Exporter Package, which you can download from the Package Manager.
After downloading and installing both, let's open the ProBuilder window by going to Tools > ProBuilder > ProBuilder Window.
Click on the New Shape option in the window.
From the GUI in the viewport select Plane, and set the Height Cuts and Width Cuts to 8, or more based on how detailed you want the cloth to be.
Now drag it across your projection to create a plane.
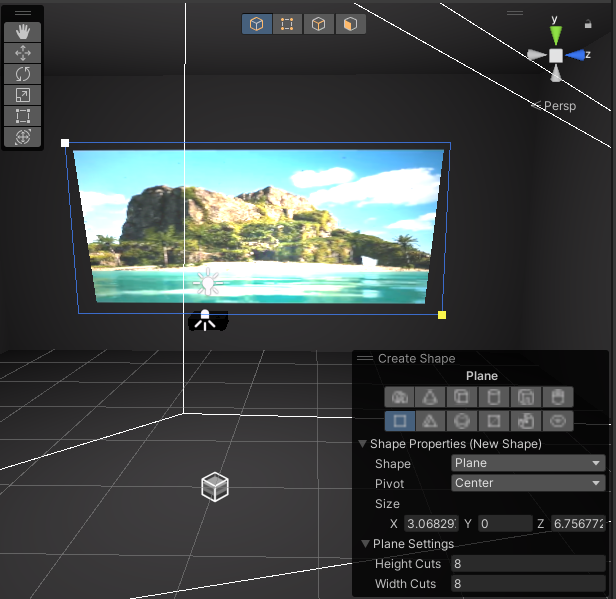
Adjust the size if you feel like it and then move on to the next step.
Once you have installed the FBX Exporter Package, you can right-click on the Plane and select Export To FBX.
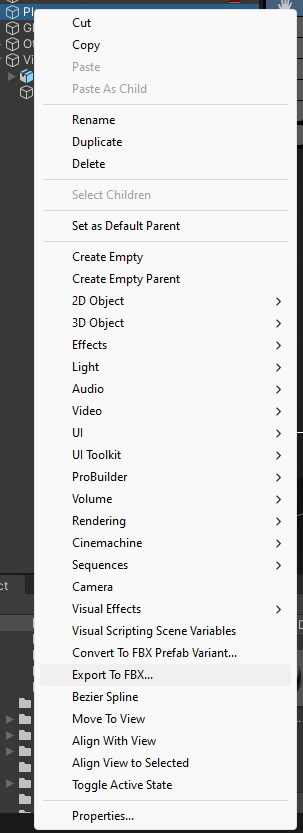
Let everything be the default option but change the Export Path to your desired location in the project.
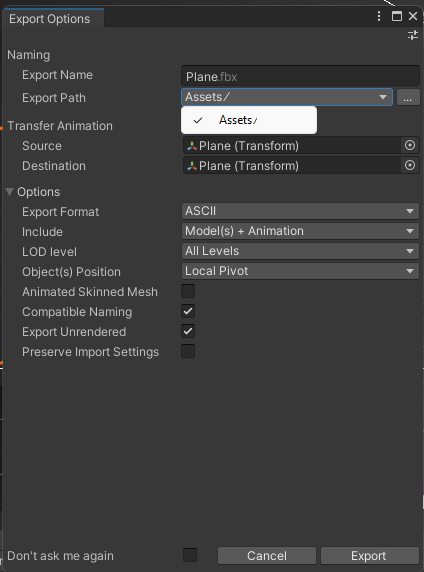
After exporting it, drag it into the scene and replace the ProBuilder plane we created earlier.
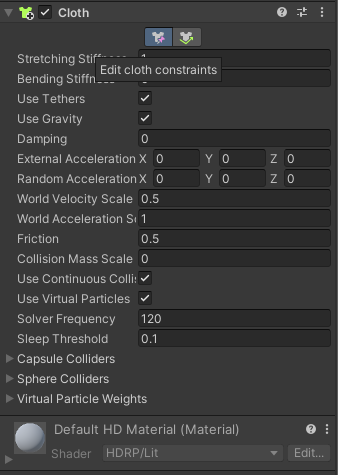
Now let's add the 'Cloth' component to it.
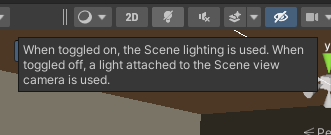
For better visibility of things we'll do next, we can disable the light in the scene window temporarily.
In the 'Cloth' component click the Edit Cloth Constraints.
In the scene window, you can now see points representing each vertex of the mesh.
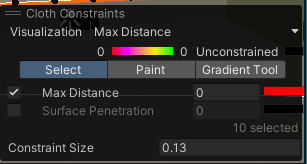
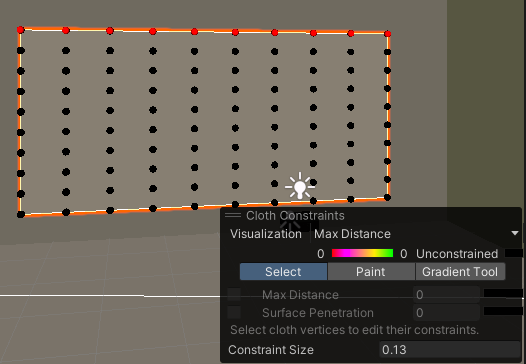
Using the Select option select all the top points.
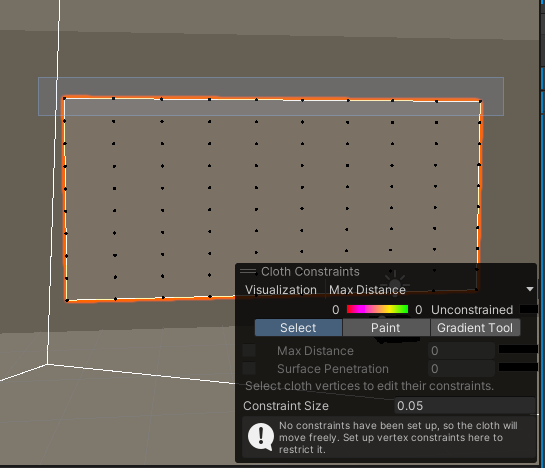
Enable the Max Distance and set it to 0, which means we are making them solid points, making them not move around at all.
Now in the 'Cloth' component set the following:
Set External Acceleration in X and Z to be 0.4, do the same for Random Acceleration.
Set the World Acceleration Scale to be 2.
Disable Use Continous Collision.
Disable Use Virtual Particles.
Set the Solver Frequency to 20, since we don't need much detailed cloth.
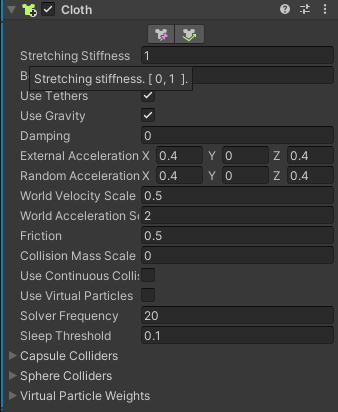
You can play around more with it to set how the cloth behaves according to your preference.
Well, that's it for this article, Hope you have as much as fun I had when creating this.
Feel free to ask me any questions.
And be sure to follow me for more things in the future here and on all my other socials. GitHub, LinkedIn, Twitter, Instagram, itch.io.